Thursday, 11 August 2016

Early Apples

It's going to be a tremendous year for tree fruits!  Before we realized what was happening, early Gravenstein apples were starting to drop off the trees!  We have an espaliered apple tree with 6 varieties grafted on it.  Apples on this tree seem to ripen earlier than on our other trees, and to my surprise, I was finding apples on the ground.  Time to do something with them!  It was easy to get my husband to gather apples for me when the reward was apple crisp for dessert.  I have a recipe that has to be one of the best apple crisps ever.  It's on the blog HERE.
Since there were so many apples, I made 2 crisps - one for the oven and one for the freezer.  I peeled, cored and sliced the apples, dropping them into water which had lemon juice in it to keep them from turning brown.
The topping is a sort of shortbread-like mixture with walnuts added at the end and roughly chopped.
When I had enough sliced, I drained the apples and mixed them with a sugar/cinnamon/cloves combination.
Topping is added to the apples and gently smoothed over the top.
Then into a 350F oven until golden brown and oozing juice.  The kitchen smells wonderful!  Now to get some vanilla ice cream and dessert is covered.  And there's another unbaked apple crisp in the freezer!

Raccoon Invasion!

Every year we have some invasion by the raccoons.  Usually it's the grapes and we have a race to see who gets them first.  If I'm not quick off the mark, I get none at all.  Greedy little raccoons!

One year it was the hazelnuts.  I usually harvest them when they start turning colour just to beat out the raccoons.  A few years ago I was a bit slow and there were none to be had.  Plus broken branches.

Devastation in the corn bed!
This year it's the corn, which is the first time they've ventured into this crop.  One morning I went out to find 4 stalks brought down and cobs ripped off.  The next morning, many more plants were brought low.
Downed corn stalks
I decided to leave the plants on the ground in the hopes that they'd leave the rest of the crop and just work on the cobs that were easy to get.
Fortex beans growing in the corn
This morning there are no new plants on the ground, so I'm keeping my fingers crossed.  If I lose the corn, I'll also lose the Fortex beans that I have growing on them.  I'm growing these beans in the corn because they tie the plants together and provide strength from the wind.  One year I grew the heritage Italian beans in the corn, but it's so vigorous that they broke the stalks!  Fortex beans are much more courteous!
Heritage Italian beans striking out on ropes strung to the fence
I didn't want to give up on the delicious heritage Italian beans though.  We've built a special sturdy frame for them.  These beans don't like to be confined, however, and I've even strung rope to the fence.  The beans have taken over 2 of the 3 ropes and are heading into the grapevines - which are set to meet them halfway.  This will certainly make picking the beans easier!
Swiss Chard growing beside the beans
Elsewhere in the garden, things are coming along nicely.  We've had quite a few meals of Swiss Chard which is such an attractive plant.
Gypsy peppers
And the Gypsy sweet peppers will soon be turning colour.  Growing them in a proper bed has resulted in a much better crop.  They share this bed with Sweet Million and Indigo Rose cherry tomatoes.  The hot peppers are growing in a bed with the Health Kick tomatoes.  You don't grow sweets and hots together or the sweets get hotter and the hots get sweeter!

Saturday, 23 July 2016

Signs of a Cool Spring

We've been experiencing the kind of spring we usually had on the West Coast of Canada - cool and damp.  Summer so far hasn't been much better.  Our previous several springs and summers were hot and dry - which brought their own problems - and I think we got used to thinking that's how it should be!  Well here we are again!
Garlic rust
My first clue that things weren't going the way I wanted them was the rust on the garlic plants.  At first I thought it was pollen - but I was wrong!  It's resulted in tiny bulbs of garlic - definitely not what I've come to expect.
Tomato leaf curl
Then there was the tomato leaf curl.  This has affected mainly the cherry tomatoes.  The Health Kick tomatoes haven't been bothered at all.  Indigo Rose, a cherry tomato given me by a friend, has been the most affected.
Blighted leaves
Some tomatoes also are showing signs of what I think might be blight.  I actually had to discard Yellow Pear.  Sweet Million has lots of yellowing leaves but is still soldiering on.
6 Kick Tomatoes
Good old Health Kick is looking as wonderful as it always has.  The first year I found a tiny Health Kick plant in a nursery was a bad year for blight.  Only at the very end of the season did I find blight on my Health Kick.  No wonder it's my "go-to" tomato!  In the picture above you can see how bushy they are - and I really did space them out.
Ripening Health Kick Tomatoes
They are covered with fruit and some is now ripening.  I look forward to lots of roasted tomato pasta sauce, tomato soup base and salsa!
Seed head on Copra Onions
This is the first year in a few that the onions have developed seed heads.  So far I've picked off 4.  That's actually not bad.  One cold, wet spring 3/4 of the plants developed seed heads.  This doesn't really affect the onions except that you get smaller bulbs which don't keep as well.
Copra Onions starting to fall over
Another strange thing happening with the onions is that they've decided they've had enough!  Most of the plants have now fallen over which is a sign that they've matured and are ready to be cured.  I'm not sure why this is happening.  This early maturing means that the bulbs aren't as big I we usually see but there's nothing for it but to go along with what the plant has decided.  When they've all fallen over and have had a bit of time to sit, I'll pull the plants and let them cure in the sun for a bit.  Then they'll go in the potting shed to completely cure so that I can remove the dried tops and nip the roots, then store them away.
Heritage Italian beans in flower
However, it's not all doom and gloom.  The beans are in flower and this year promises to yield a bumper crop of the heritage Italian and Fortex beans.  Luckily a relative has given me a recipe for her delicious dilly beans which will help use up some of them.
Liberty apple tree
This will also be a stellar year for the apples.  Every tree is loaded in spite of thinning.  The poor little Liberty is dragging on the ground - as it is every year.  Liberty is a tremendous producer of tart-sweet small beautiful red apples.  One of our favourites!  And to look at it, you'd never believe that I've removed 3/4 of the apples in thinning!

With vegetable gardening, every year is an adventure.  Things are never the same from one year to the next.  You just have to ride it out and hope for the best.  And every gardener thinks, "Next year....."

Wednesday, 20 July 2016

A New Strawberry Bed

We are currently growing two kinds of strawberries, everbearing and June-bearing.
Everbearing strawberry planted in a tire
We bought 4 everbearing plants this spring and will start a proper bed with them soon.  Currently they are housed in a temporary bed and are doing very well.  Everbearing strawberries don't have the deep delicious taste that the June-bearing ones do, but they produce right into the fall and they certainly taste delicious when all you can see in the stores are the hard tasteless ones that are imported!
Totem plants growing in a 4x4 concrete raised bed
The June-bearing strawberries we grow are Totems.  I got them from a friend who got them from me!  We stopped growing strawberries as we were tight for room.  Thank goodness he is still growing them!  We planted these ones in a 4x4 raised bed and they did well for a couple of years.  Since this was a new bed, the nutrition wasn't as good as beds we've been tending for years.  The time had come to de-commission this bed and rebuild the soil.  Strawberries are extremely efficient reproducers and are constantly sending out runners.
9 rooted plants waiting to be settled in their new home
I filled 9 pots with soil and anchored a runner in each.  When they had firmly established themselves -it only took a couple of weeks - they were ready to go.  I snipped each runner from its parent and then moved the plants to their new bed.  And as it happened, each little plant was already making its own little runner.
Soil prepared for the new plants
The bed they were destined for had recently housed my poor rust-infected garlic.  Since no alliums should be planted here for at least 3 years, making it into a strawberry bed is a perfect solution.  For now they will share the bed with carrots, but it won't take long for us to eat them up and free the bed for strawberries.  This bed was well prepared for the garlic and had been mulched with SeaSoil.  All it needed was turning over.
Pots set out to get proper spacing
I placed the new plants approximately where I wanted them, leaving plenty of room so that their runners would have room to root as well.
All done!  They just need a good watering
Then the plants were firmed into the soil.  I was careful not to plant them any deeper - strawberries hate that!  If planted too deeply, the crowns will rot.  Then the runners were placed approximately where I wanted them.  Finally the whole bed got a good watering.

Sunday, 29 May 2016

Transplanting the Corn

Today marks the beginning of some nice, warm weather.  It's a perfect time to set out the corn.  I started the seeds in the potting shed - actually 2 plantings as the first one had spotty germination.  Only one section of my 32-section planter has failed to produce a corn seedling but I haven't given up on that one yet.
The bed was started a while ago with 3 wheelbarrows of soil removed.  The soil was put on top of composting vegetation to grow squash on, but that's another post!  Today I raked 2 wheelbarrow loads of finished compost on the bed.
This year, I'm going to plant the corn in a different pattern.  It seems to me that it will grow more stably if I plant the seedlings in small bunches with a bean in the centre.  I drew 8 rough circles in the soil, each of which will hold 4 seedlings and one bean.  My planter has large holes in each section, which allow me to poke a finger up to help ease out the seedlings.  Corn isn't really meant to be transplanted, but I do it anyway!
After the circles were planted (one has only 3 seedlings) a Fortex bean seed was planted in the centre of each.  The beans will grow up the stalks of corn and give them stability while adding nitrogen to the soil - a happy pairing.
Finally, the bed was given a good watering.  Tonight I'll put Remay cloth over the corn to give it extra protection.  In the background, you can see that the Italian heritage beans are flourishing and almost ready to start climbing the bean frame.
In the rest of the garden things are growing well.  The snow peas are in flower and within the week I will be picking the bounty.
A Bonica rose which came from my daughter, is in full bloom.  It always puts on a great show.  Too bad it's unscented.
Not to be left out, Abraham Darby, a David Austen rose, is in full bloom giving us beauty and lovely scent to boot.

Friday, 20 May 2016

Garlic Rust!

I've grown garlic for years with relatively little problem.  One year the bulbs were a little on the small side.  Another year, nearly all of the plants I started from purchased bulbs didn't sprout.  But in almost 20 years, it's been a love/love relationship.  Until this year!
Rust on garlic leaves
I'd noticed the orange staining on leaves and assumed it was the result of our extremely heavy pollen year - our brown roof is gold!  Then noticing that the staining was advancing, I finally did some research into garlic problems and discovered that it's rust!  Puccinia porri, to be exact. We have had an extremely wet early spring and apparently this is what has brought it on.  Leningrad and Porcelain plants seem to be the ones most affected - the larger bulb-producing plants, of course.

What to do?

I imagine that there are chemical controls for this, but I didn't even investigate that.  I got out a pair of ancient dressmaking scissors that are never used in the garden.  Wearing a new pair of gardening gloves, I snipped all the lower leaves from the plants and affected portions of upper leaves.
Sad looking garlic planting with affected leaves removed
The poor plants look pretty bald!  I gather that the plants will still produce bulbs although I'm expecting that they'll be smaller than usual.  Once finished, the scissors went back into the house for disinfection and the gloves went into the wash.

Prevention of future outbreaks

I won't grow any members of the Allium family in this bed for 2 or 3 years - onions, leeks, garlic.  Watering in the morning only is important and water the ground, not the leaves.  You don't want the plants to spend the cool nights with water on their leaves if you can help it.
Affected leaves headed for the burn pile
Cleanliness is important. As I said above, everything used to remove the affected leaves has been taken away.  And the removed leaves will go straight to the burning pile - definitely not composted.

I have learned a lesson from this.  Now that I know what it looks like, next time I see rust on garlic (or any Allium) I'll remove it immediately.  If we experience another extremely wet spring, I might consider putting plastic over the garlic to keep it dry.  Crop rotation - which I've always practiced - is important.  Any sign of rust will mean that that particular bed is out of action for Alliums for at least 2 years.  And having never seen rust on Alliums before, I hope I never see it again!

And one final note from my research.  Apparently the bulbs are not affected and it's perfectly safe to use cloves from these bulbs next year.  So as usual, I'll save the best bulbs for planting in the fall.  And perhaps I'll stick to the varieties that were least affected - Spanish Rioja, Czech and the unnamed variety I've been growing for years.  We'll see!


Tuesday, 10 May 2016

Corn!

Now that we are deciding that while the real estate market on Vancouver Island is hot, hot, hot, on our tiny Gulf Island, it's not, not, not, I'm becoming resigned to the strong possibility that we will be staying here for the near future.  And that's not a bad thing!  We love the peace, security and quiet of our little island and have a lot going for us here.

And with this in mind, my enthusiasm for gardening - which had cooled somewhat lately - has returned full force.  It was time to start the corn!  I start my corn in the potting shed.  This allows me to start it earlier than I would outside which is a help when growing the sweeter varieties which take longer to mature.
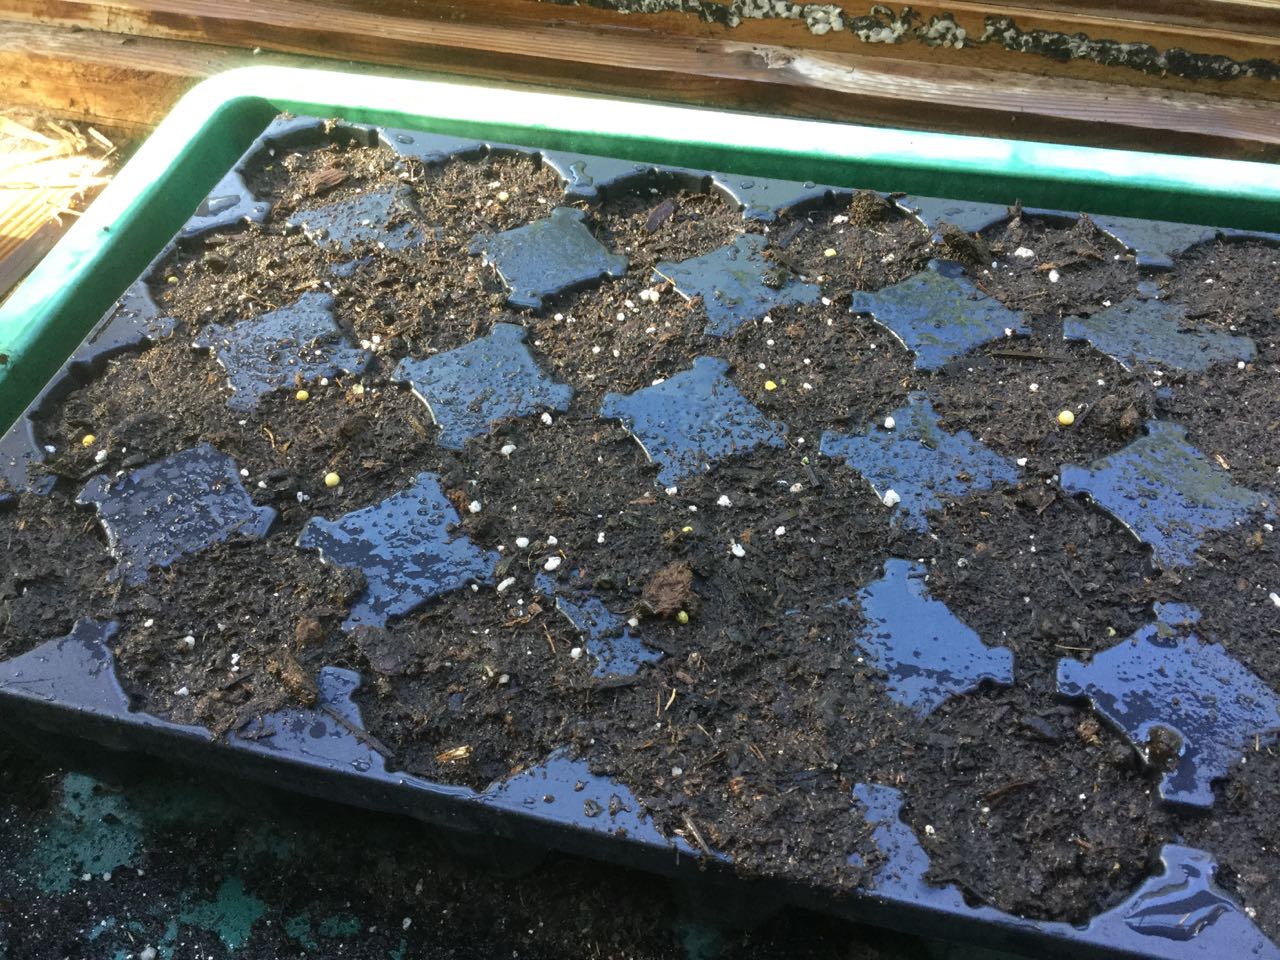
I purchased extra deep potting trays from Lee Valley some years ago, and they work really well for corn which sets long roots and doesn't particularly like them disturbed.  Each tray has 36 sections, which is enough to give us a few good feeds of corn - that's all we ask for!
I fill the corn tray with a good potting soil, shake it to settle the mix and then add a bit more on top to fill the sections.  Then I place one seed in each section and press down with my index finger to just past the first knuckle.  More soil goes on top to cover the seeds.
The tray get a good watering.
Finally a plastic lid goes on top to keep the heat in for germination.  I will wedge pots at each side just in case a mouse decides to check out my seeds.  One year I had to give up on starting corn in the potting shed as mice came in and ate every seed!

The seeds will sprout quickly and just as I'm starting to see roots popping out the bottom, I'll plant them in their new home.  A covering of Remay cloth will keep them warm until summer is firmly in place.

Corn planting done, it was time to water the rest of the garden and do a few chores.  I like the early mornings for garden work.  Watering - which I prefer to do by hand - gets plenty of time for the moisture to seep down into the soil.  I take this time to thoroughly inspect each crop and adjust care as necessary.
I planted the beans a week ago.  This year I didn't move the bean structure as we weren't sure what our status would be.  It doesn't really matter with beans as they're happy to continue building up nutrition in the soil.  We'll move it next year.  I planted the beans at the base of the structure, 5 beans to a structure wall, protected them with water bottle collars and supplied each seed with a bamboo pole to help it reach the structure walls.  And yes, I haven't removed all of last year's dead bean vines.  They will eventually break up and fall down all on their own.  I am "The Messy Gardener" after all!
This morning I could see that the bean seeds have germinated with a lively green sprout showing in nearly every collar.

Finally I potted up the 2 remaining tomato plants which are destined to go to a friend who is still away on a trip.  The plants went into gallon pots and will now live outside with the rest of my tomatoes until the friend returns and can take them.

The only plants left in the potting shed are the peppers and a basil, all of which need hotter weather before they can go outside.