Showing posts with label potting shed. Show all posts

Tuesday, 10 May 2016

Corn!

Now that we are deciding that while the real estate market on Vancouver Island is hot, hot, hot, on our tiny Gulf Island, it's not, not, not, I'm becoming resigned to the strong possibility that we will be staying here for the near future.  And that's not a bad thing!  We love the peace, security and quiet of our little island and have a lot going for us here.

And with this in mind, my enthusiasm for gardening - which had cooled somewhat lately - has returned full force.  It was time to start the corn!  I start my corn in the potting shed.  This allows me to start it earlier than I would outside which is a help when growing the sweeter varieties which take longer to mature.
I purchased extra deep potting trays from Lee Valley some years ago, and they work really well for corn which sets long roots and doesn't particularly like them disturbed.  Each tray has 36 sections, which is enough to give us a few good feeds of corn - that's all we ask for!
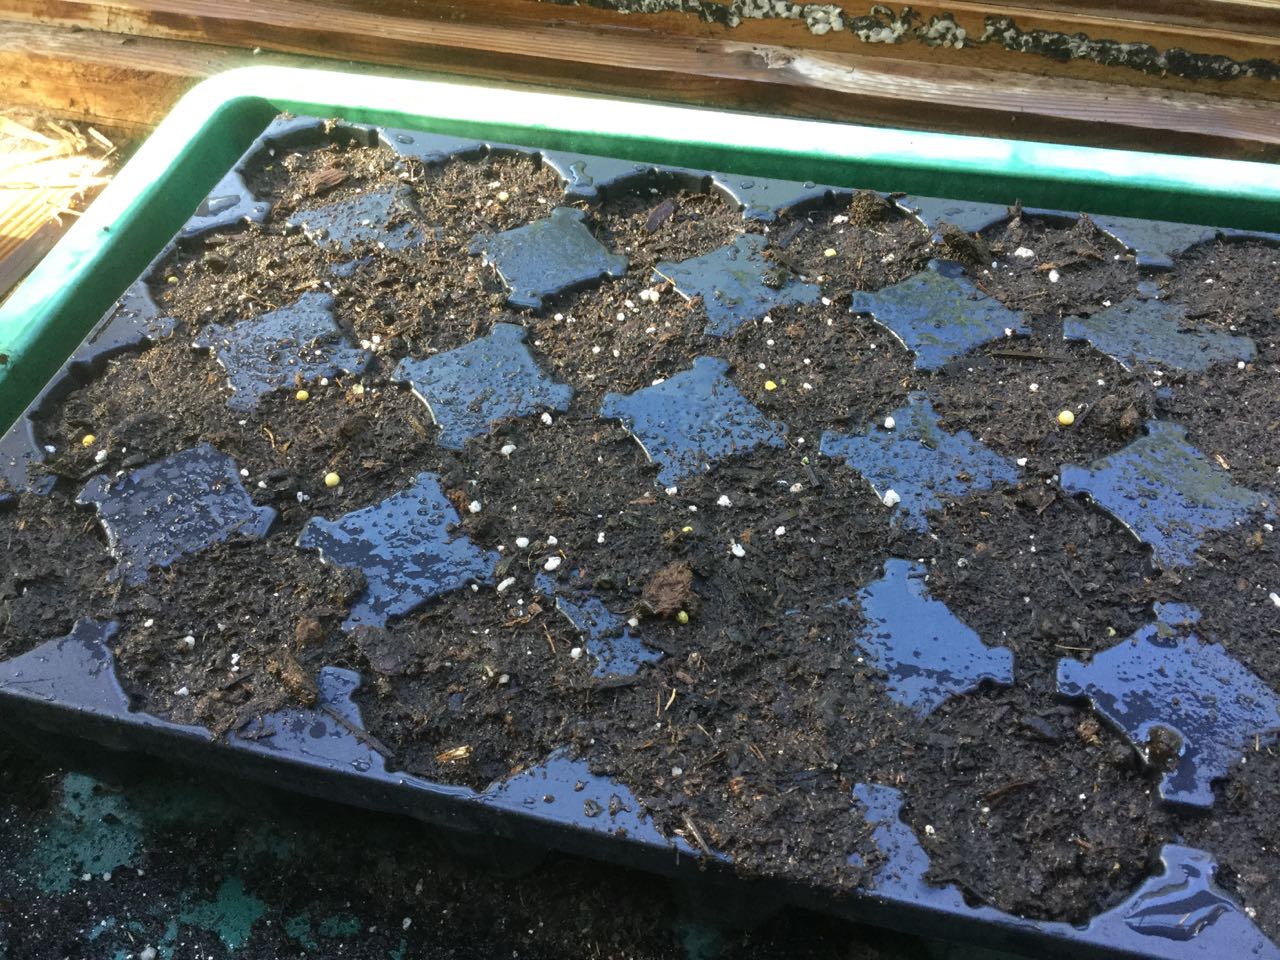
I fill the corn tray with a good potting soil, shake it to settle the mix and then add a bit more on top to fill the sections.  Then I place one seed in each section and press down with my index finger to just past the first knuckle.  More soil goes on top to cover the seeds.
The tray get a good watering.
Finally a plastic lid goes on top to keep the heat in for germination.  I will wedge pots at each side just in case a mouse decides to check out my seeds.  One year I had to give up on starting corn in the potting shed as mice came in and ate every seed!

The seeds will sprout quickly and just as I'm starting to see roots popping out the bottom, I'll plant them in their new home.  A covering of Remay cloth will keep them warm until summer is firmly in place.

Corn planting done, it was time to water the rest of the garden and do a few chores.  I like the early mornings for garden work.  Watering - which I prefer to do by hand - gets plenty of time for the moisture to seep down into the soil.  I take this time to thoroughly inspect each crop and adjust care as necessary.
I planted the beans a week ago.  This year I didn't move the bean structure as we weren't sure what our status would be.  It doesn't really matter with beans as they're happy to continue building up nutrition in the soil.  We'll move it next year.  I planted the beans at the base of the structure, 5 beans to a structure wall, protected them with water bottle collars and supplied each seed with a bamboo pole to help it reach the structure walls.  And yes, I haven't removed all of last year's dead bean vines.  They will eventually break up and fall down all on their own.  I am "The Messy Gardener" after all!
This morning I could see that the bean seeds have germinated with a lively green sprout showing in nearly every collar.

Finally I potted up the 2 remaining tomato plants which are destined to go to a friend who is still away on a trip.  The plants went into gallon pots and will now live outside with the rest of my tomatoes until the friend returns and can take them.

The only plants left in the potting shed are the peppers and a basil, all of which need hotter weather before they can go outside.

Thursday, 3 March 2016

In Transition

I haven't written in a while - partly because life has kept us busy - but mostly because we have decided that it was time to move.  After dealing with my Father's estate my husband and I realized we didn't want to leave our children with the problems associated with sorting out and selling a property that required ferry trips.  We would also like to downsize the amount of land we have to upkeep.  Moving seemed like the obvious answer.  And we wanted to make the move while we were still healthy and strong enough to organize our own move.
Coral bark maple and King Edward currant

This has not been an easy decision.  We are very happy here.  It's a private, secure oasis in a busy world that is increasingly unsafe.  We put our property on the market with the thought that it might take some time to sell - and that would be fine with us.  Therefore, the garden must go on.

Our priorities for a move will sound strange to many people.  My husband needs somewhere for his woodworking tools - somewhere big!  I need a level, sun-filled yard for my vegetables with no near-by cedar trees.  Oh, yes!  And a house!

I have already started a number of seeds under lights in the house - Copra onions and Bandit leeks - and they have been moved out to the unheated potting shed to join lettuce - Black Seeded Simpson, Drunken Woman and Red Sails, Kale - Improved Siberian and Lacinato, and Santee sprouting broccoli.  I also started my tomato and pepper seeds.

In the tomato line this year I'm growing my Health Kick plus a variety of cherry tomatoes - Yellow Pear is new at my house but comes with high recommendations,  Principe Borghese, Sweet Millions and Gold Nugget.  Unfortunately, in my haste to get the tomatoes planted, I double planted the Sweet Millions and Gold Nugget seeds!  However, once they get growing I know I won't have any trouble telling them apart.
Starting transplanting

Today the tomato seedlings were getting leggy enough that it was time to get them out to the potting shed.  Tomato seeds need heat to germinate, but once they're up, they can take cooler environments.
Plant tomato seedlings deep - almost up to the seed leaves

As always, when transplanting tomatoes, I plant them deep.  That gets rid of the legginess and provides more rooting area which makes for a stronger plant.  I put a small amount of potting mixture in the bottom of the containers and then insert the seedling as far into it as I can so that just a small length of stem is above the soil.
Transplanting finished the seedlings can enjoy a sunny spring day

Transplants finished, everyone gets a good watering with 20-20-20 dissolved in the water.  Later this afternoon when the potting shed is no longer in the sun, I'll put a plastic cap over the tomato seedlings.  This year, with a possible move in mind, I've put all my seedlings in 6-pack planters.  This takes up less space and I can easily transplant again into larger pots if necessary.  Spring gets going into high gear once again!

Monday, 8 June 2015

Bean Supports

I prefer to grow pole beans.  They take up much less room than bush beans and are so much easier to pick.  I've tried a number of support systems - single poles, tripods, etc.  A few years ago, I asked my husband to make me a portable rack that would fit across our concrete raised beds that could be moved from bed to bed each year.  It worked out very well - except for the fact that he made it 8' tall - who can pick beans that high without a ladder?

Friends have one of their vegetable beds in a big circle.  Wire fencing is formed into a spiral and they grow squash, tomatoes, garlic, onions and beans in it.  It's beautiful and functional.  The beans grow up the fencing and are encouraged to cross from fencing top to fencing top - it makes picking pretty easy!  That gave me the idea to try something similar in my garden.

Obviously I can't do the spiral gardening thing as my beds are already in place and are permanent.  But I could set up framework to make a sort of arbour which could be taken apart at the end of the season and could travel across a couple of beds.  It was worth trying!
The new bean arbour spanning 2 beds.
Yesterday, my husband made up 3 wooden rectangular frames 4' wide and 4' high.  We set them up on the south side of one bed and both sides of the bed next to it.  I had already planted beans earlier in anticipation of the plan.  Next we took the 8' frame from the portable bean rack and set it on top.  Naturally it was a lot more complicated than these few sentences make it sound!
Beans now on bamboo poles - I will guide them to the chicken wire when they get bigger.
Today I stapled chicken wire to the 3 support rectangles of the bean arbour.  As the bean plants get taller, I'll guide them to the wire so they clamber up the sides onto the top.  As the plants will be about 6' above the ground, it should be pretty easy to pick beans.  In theory, anyway!  I guess we'll see.

Tomato Experiment Update:
The plant on the left is the experimental plant.  Much bigger than the one on the right!
About a month ago now, I planted one tomato outside under a plastic cloche.  A couple of weeks later, I planted out the rest of the tomatoes.  I made sure that a plant that had been the same size as the experimental plant was situated right beside it.  My thought was that the plant kept longer in the potting shed would be healthier and more advanced.  It does have more flowers but the first tomato is much bigger and healthier looking.  I sure got that one wrong!

Friday, 27 March 2015

Potting Up

Yesterday I finally got around to potting up little transplants.  I'm growing a lot of tomato plants for friends this year and have moved the tiny seedlings out to the potting shed.  Tomato seeds need heat for germination, but once they're up, they can take some cool temperatures.  With night time temperatures starting the move up, the potting shed it the place for them so they don't become too leggy.
Tomato and pepper seedlings in their temporary new homes
I always put the transplanted tomatoes deeper in the soil.  They will create roots on the buried stem, making the plant stronger and also making them less leggy.  More detailed directions on potting up tomato seedlings can be found in a March post from last year. At the same time, I potted up pepper plants.  They've been in the potting shed for a week now and are doing well.

My big problem is with pots.  I love to give away plants, but it's leaving me a bit short of 4" and 6" pots.  I'll have to ask for some pots in return!
Victoria Celery
This year I'm growing celery for the first time.  I carefully transplanted a dozen tiny seedlings into 6-pack planters and they have all survived.  Naturally, the ones left in the starting pot are ahead of them, not having suffered the shock of transplanting.  I may set out some of those as well as there are lots to choose from.
Lettuce Seedlings
Lettuce plants are also doing very well and I'll probably be able to set them outside any day now.
Red Currant volunteer against the potting shed
Today the weather is glorious, in spite of a dismal prediction.  The blue orchard bees are starting to emerge from their winter homes and the red currant is loud with the noise of pollination.
In the pond, the water marigold is coming into full bloom.  Fish are starting to come up for food and all the aquatic plants are waking up.  Spring is definitely here!

Saturday, 7 March 2015

Hectic Spring

This time of year is always a flurry of activity.  Each week something needs to be seeded, moved to the potting shed because it has sprouted or transplanted into the garden.  There's also the beds to be readied.  There's a big pile of SeaSoil sitting on and under tarps and as the driver wasn't able to back up to where we wanted it dumped, it will have to be moved.  The maple leaves that were gathered last fall now need to be shredded.
Asparagus roots to be discarded with the finished bed in the background
First on the agenda was removing one bed of asparagus.  These particular plants are quite old - at least 15 years old - and needed to be replaced.  It was a lot of hard work for my husband, digging out the bed and depositing the root-filled soil on a tarp.  Then he sifted out the roots and dumped the dirt back in the pit.  In between layers of sifted soil, we added a good thick layer of SeaSoil.  The bed is filled now to overflowing but rain will tamp it down and we're expecting some this next week.  I'll buy a package of asparagus roots and plant them next week.
I'm growing celery for the first time.  A friend that I give tomato seedlings to has grown it for years and says it's pretty easy.  She freezes chopped celery to add to soups and stews during the winter.  I bought seeds of a variety called Victoria which is apparently quite popular in Britain.  The tiny seeds took a couple of weeks to germinate.  Today I transplanted a dozen tiny seedlings to 6-pack planters and they're sitting under plastic in the potting shed.  Any seedlings that fail to take will be replaced with a good supply of what remains in the spouting pot.
Seedlings!  Seedlings!
I also seeded the tomatoes today.  Because I now grow lots of tomatoes for friends, there's quite an array of pots.  I'm not sure where I'm going to put them all because they need heat for germination and there's only so much room under the grow light in the living room.  Perhaps it's time to get a bigger one!  For now I'll probably put them in plastic bags and sit them on the living room window still until the peppers finally sprout and I can move them to the potting shed.

About half of the raised beds are prepared.  Each one had a good amount of SeaSoil added, then a good dusting of my fertilizer.  At this time of the year, I wonder how I can possibly fill them.  By the end of April I'll be wishing I had more room!

Tuesday, 24 February 2015

Tidying Time

As I've said before in a previous post, this past summer/fall has been chaotic.  As a result, I'm very far behind in tidying up chores - not that tidy was every part of my persona!  I am The Messy Gardener, after all.  We're experiencing some beautiful - and unseasonable - weather and today seemed like a good time to tackle the potting shed which hasn't had a good clean out in a couple of years.
Before - there's barely room to stand!
The potting shed is a very small but practical space.  It's storage for the gardening tools and is where I start plants before transplanting to the garden.  Sometimes when I'm in a hurry, it's an invaluable place to chuck things that I'll get to later.  Unfortunately "later" sometimes takes a long time coming.  Today was "later".

The "before" picture doesn't do it justice as a multitude of things had been crammed under the potting benches.  Surprisingly it didn't take all that long and I carted away a wheelbarrow load of detritus, most of which could be burned.  All of the pots which had been stored on ledges above the main potting bench were moved to the end of the potting shed where they are much easier to get at.  Larger pots were stacked under the counter.
After - it's actually a lot tidier than it looks!
Now that things are much tidier, I'm ready for the rest of the "starting" season.  Next week the tomatoes and peppers will be seeded and brought indoors to sprout.  I've also had a good look at my supplies for fertilizer and now know what I need to buy so this year's batch can be made.  And what a feeling of self-satisfaction at being able to work in a neat environment.  Too bad it doesn't last....

Wednesday, 4 June 2014

Three Sisters - Year 2, Planting Beans

Today has turned out to be a gorgeous hot day - in spite of the weatherman!  We were forecast to be cooler today and indeed, this morning was breezy and cool, but the wind died down and this afternoon it's lovely and warm.  As we're expecting at least a week of nice weather, time to plant the rest of the beans.

This year, I'm not planting nearly as many beans with the corn.  I have the Italian heritage beans planted in two spots elsewhere, but this year I'm planting Fortex beans in with the corn.  This is a bean I've grown every year except last year.  It produces an abundance of filet beans about 10" long which freeze well.  While the vines are vigorous, the leaves aren't nearly as large as on the Italian heritage beans and since I'm only planting 6 beans per bed, there shouldn't be nearly as much strain on the corn.

The corn germination has been quite disappointing.  As noted earlier in this blog, I usually start the corn in the potting shed and transplant it.  A mouse (or mice) destroyed all my Bodacious seedlings so I've had to plant directly outdoors and then didn't have enough corn seed left to completely plant the beds.  A final row was seeded with Peaches and Cream.  I now have 34 Bodacious plants and 15 Peaches and Cream.  As I'm not saving seeds, there should be no problem growing the two varieties together.
Bean seeds protected with a water bottle collar
To plant the beans, I pulled back the Remay cloth and seeded 6 Fortex beans per bed, 3 on each side.  Four of the seeds were protected with water bottle collars and 2 were planted without.  It's an experiment!  As I pushed each seed into the ground I could feel how hot the soil was - perfect! While planting the seeds, I discovered an extra butternut squash plant.  I had seeded 2 seeds per pot when I started them in the potting shed and once they were up, discarded the weaker one.  I guess a seed was late coming up!  One of the beds has a bare spot at a corner, so - waste not want not - I transplanted the little squash there.
Three Sisters beds with the transplanted squash seedling in the closest bed bottom right
Now the Three Sisters beds are complete.  For now it's just wait and watch.  For the next little while, I'll continue to cover the beds with Remay cloth at night and remove it during the day so that the soil can get nice and warm.  Next year these beds will be dismantled as the wood in these old beds is rotting.  We'll replace them with one big concrete raised bed but this time without a bottom as cedar roots don't seem to have reached this far - yet!

Friday, 30 May 2014

Three Sisters Year 2

Last year, the Three Sisters garden was quite successful and so warranted trying again - with some changes.

This year, I planted the corn in the potting shed as I've done for years now.  As can be seen from earlier posts in this blog, mice have decided I'd given them a banquet!  I therefore had to plant the seeds directly in the garden and after trying twice in the potting shed, didn't have enough Bodacious corn seeds to fill the beds.  Unable to find any of that seed, I planted a row of Peaches and Cream.  It will be a week later than the Bodacious, but this year I'm planting my rows in diamond pattern so hopefully if they tassel out at different times, there won't be much of a problem with pollination.
Remay protection on cool days and at night
The first seeding of corn is up and about 4" high.  I'm covering it at night with Remay cloth and opening it up during the day.
Remay off on sunny days until the weather is reliably warm.
At the same time that I planted the corn, I set out 3 butternut squash plants.  2 of these are at the south ends of the beds and 1 is in the centre.
Bodacious corn seedling
As I said above, the corn is about 4" high now.  When it reaches 6", I'll plant the Fortex beans and protect them with water bottle collars.

So what am I doing differently?

Last year the beans were so lush and heavy that they broke the corn stalks.  This year, I'm growing Fortex beans in the corn.  It's not as big-leafed as the Italian heritage bean which I'm growing elsewhere.  I planted it at the same time as the corn last year, but this year, I'm giving the corn a head start - which I was supposed to in the first place.

Last year, I grew too many squash plants and the ones at the back of the beds didn't do nearly as well as the ones in sunnier spots.  This year,  I'm only growing 3 plants and all are placed in the sunniest spots.  In addition, I didn't seed corn to the end of the beds at the inside where the 2 beds meet.  Hopefully this will give the squash enough room to grow.

I grew zucchini in the tires at the back of the bed last year.  This year, the zucchini is planted in a concrete bed in front of the Italian heritage beans seeded at the bean rack.  I'll plant impatiens in the tires as they like a bit of shade - and we always need flowers in our lives!

Thursday, 27 March 2014

Repotting Tomato Seedlings

Today is a mizzly (that's a word, right?) overcast day and while it's cool, it's not cold.  Perfect weather for repotting tomato seedlings.
Health Kick tomato seedlings ready to be repotted.
I seeded them 2 months ago and nearly all the seeds have come up.  They're a little on the leggy side but that's just fine.  Tomato seedlings should be replanted to just below the first seed leaves.  They'll develop roots on all the reburied stem sections, making the plant stronger in the long run.
Tools assembled
My potting shed is a bit of a mess after a winter of neglect, so the first order of the day was to tidy up the bench and assemble all the things I'd need for the job.  The repotting tray is one of a pair I picked up on sale at Lee Valley for $5 each.  The labels were cut from a milk carton and will be marked with a grease marker.  I fill recycled pots with a purchased potting mix and wet thoroughly with a 20-20-20 solution.
tomato seedling ready to put in the pot
With the invaluable plastic knife, I make a good-sized hole in the pot and slip a seedling in, firming gently in place.
Firmed in - ready for backfill

Then I carefully add more potting mixture around the seedling covering the stem to just below the seed leaves and tuck in a label.
Repotting complete
Finally, all the seedlings are repotted and the bench is tidied up.  There are still onion, leek, kale and lettuce seedlings, but they'll all be replanted outside in April.
Seedlings waiting for the sun to come out
Now we just wait for the weather to warm up.  There'll be lots of plants for me and leftovers for friends.  I hope I can remember everyone I promised plants to!

Wednesday, 26 February 2014

It must be spring!

The aftermath of our snow storm which knocked out power twice.
I don't care what the weather is outside or the fact that the ground is covered with snow from our recent snow storms.  It simply has to be spring because today I started seeding! I have a small amount of seeding mix left but not enough for all the seeding I had to do.  I filled the bottoms of the pots with potting mixture and the tops with the fine seeding soil mixture.  Make do!
Leeks, onions, kale and lettuce will all germinate in the potting shed
Today I started the following:

Kale - Improved Siberian and Redbor
Lettuce - Black Seeded Simpson, Red Sails and Drunken Woman
Onions - Copra
Leeks - Bandit

These pots will stay in the potting shed as they don't need the heat to germinate.  They will be protected, however, with a plastic dome.
Seeding done
Tomatoes - lots of these!
Cherry - Gold Nugget, Sweet Million, Sweet Baby Girl and Principe Borghese
Plum - Health Kick and Classica

These pots are now under lights in the house.  Tomatoes need the heat to germinate but can take cool once they're up.  I've seeded 11 of the Health Kick as I've promised plants to friends and family but I plan on keeping at least 4 for myself.  Classica is a new hybrid variety that I thought I'd try.  Both are from T&T Seeds.  Not sure how many Classica I'll have as the pot tipped over and I lost some of the soil!  If I just have a couple, I'll be happy.  I'll look for a plant or two for slicers.
Tomatoes under light in the living room
It'll be at least another month before anything else gets planted, but in the meantime, I need to go through all my seed packages, note on the front what gets planted when and sort them in the seed box my husband made for me.  As far as I'm concerned - it's spring!


Monday, 18 March 2013

Mason Bees

Without pollinators, the earth would be in serious trouble.  In fact life can't exist without pollinators.  North American honeybees are in a critical decline due to mite infestations which carry deadly viruses.  I know for a fact that some summers I never see a honeybee.  The gardener must rely more and more on other pollinators.

An excellent pollinator for the backyard gardener is the mason bee, osmia lignaria, also called the blue orchard bee.  It's a solitary bee and very gentle.  They don't sting and look rather like a large fly.  We've been providing nests for them for a number of years now.

A simple nest can be made from a block of wood with holes drilled in it.  The holes must be 5/16" inside diameter and at least 6 to 8" deep.  This last measurement is important because the eggs producing females are deepest in the hole, with eggs producing males on the outside.  Since the females are the ones who do all the pollinating, it is key that the most female eggs are provided for.

Another simple nest can be made of straws - again with an inside diameter of 5/16" - and placed in a plastic drain pipe to hold them together.  The ends of the straws must be crimped off.

The most satisfactory nests are ones which can be opened and cleaned since mites can kill off mason bee populations also.  We purchased ours from Quack Farm Nursery, who in turn got their supplies from Beediverse, the company of Dr. Margriet Dogterom who has been researching and promoting Mason Bees for over 30 years.  These days, mason bee supplies and even mason bee cocoons can be purchased from most nurseries.

Today was a lovely, sunny day and when I checked our nests, which are under the south-facing eaves of the potting shed, I could see that some of the straws have the mud plugs missing.  A careful search of the nearby flowering currant showed lots of bumblebees, but no mason bees.
Mason bee nests sheltering under the potting shed eaves
The first bees to emerge are the males.  They are distinguishable from the females by white hairs on their heads and longer antennae.  They stay near the nests waiting for the females to emerge so that they can mate with them.  The females immediately set about gathering pollen.  They take the pollen back to the nesting site and when they have a plug of pollen, they lay an egg on it and seal it in with mud.  Then off they fly to gather more pollen and lay another egg.  This all takes place in the spring at a time when fruit trees are blooming.  It's important that once mason bees start filling up the nesting tunnels that they are left strictly alone until the fall.  If the nesting site is moved, the eggs could fall off their pollen store.
Last summer's bees busily filling up tunnels
In summer, the egg hatches into a grub and starts eating the pollen plug.  When fully grown, it spins a cocoon and changes into a pupa.  Eventually it becomes an adult bee and stays that way until the following spring, when it emerges and starts the cycle all over again.

Anyone can promote the well-being of mason bees.  Now that spring is here, cocoons are readily available at nurseries.  Consider buying some and setting out some nesting blocks for them.  More information can be had at the Beediverse website.  There are books and DVDs available to help you set up your colony.  This is a win-win proposition for everyone from the bees to the planet!

Tuesday, 12 March 2013

Coming back to life

After almost 2 weeks of being under the the thumb of a particularly nasty virus I feel like it's not just the garden that's coming back to life!  We've had some lovely weather lately, but I've been unable to enjoy it.  Today is the first day that I've got enough energy to go outside and actually do a little.

The tomato seedlings have nearly all sprouted and most are over-ready to be in their new pots.  Today was supposed to be a day of torrential rain and wind, but happily the weatherman was wrong.  Taking advantage of a nice break in the weather, I took the seedlings out to the potting shed to move them into their new temporary homes.  As usual, I've grown more tomato plants than my needs require but there are always friends happy to take in a stray or two.  I was able to pot up 11 Bonny Best, 4 Gold Nugget and 6 Sweet Baby Girl.  I had planned on growing Stiletz as well, but when the time came to start the seeds, the package was nowhere to be found.  Principe Borghese, always a slow sprouter, was just breaking the soil, so they were brought back into the house to get a little stronger.  I'll look for another main crop tomato next time I'm near seed racks as there's still time to get them started.
Newly transplanted tomato seedling
I'm using up the last of my Quack Farm potting mix.  I've filled 4" pots with the mix, watered well and made a hole to receive the seedling.  I plant the seedlings deep.  This serves two purposes:  firstly, it shortens the stem of the plant so it doesn't become too weedy and secondly, the buried stem sends out roots and makes a stronger base for the plant.  When transplanted to their final spot, they can again be planted deeply.  Once in their new homes, the seedlings were covered by plastic domes to keep in heat and moisture.  Tomato plants need heat to germinate but can take much cooler temperatures for growing.  There's no need to make them too cool, however!  They'll keep the domes for a couple of weeks or so until they're well-established.

Each little pot is marked with a homemade plant tag.  I cut the tags from old yogurt containers and write the names on with a grease marker.  I used to use Jiffy Markers, but they fade.  When time came to plant the seedlings, sometimes I couldn't read the names anymore!  Grease markers stay bright for several seasons.
One tray full of seedlings ready for the plastic dome
Transplanting done, there was time to take advantage of sunshine forcing its way through the clouds and take a tour of the property.  And by the time I'd done that, I was pooped.  No more work today!
King Edward flowering currant almost ready for the hummingbirds
Dwarf narcissus beaded with recent rain

Rhubarb thrusting up through their leaf mulch
Three Sisters Bed patiently waiting for the next step


Saturday, 26 January 2013

It's Planting Time!

Just before Christmas my seed order from West Coast Seeds arrived.  There's nothing like the arrival of a seed order to get a gardener's juices going.  However, Christmas - and winter - do have precedence.

Seeds!
Today, January 26th, I just couldn't wait any longer, so I decided to give onions and leeks a try in my little unheated potting shed.  After moving a Gartenmeister Fuchsia which I'm trying to coax through the winter and sweeping off the counter, I filled 3 round pots with a seeding soil, wetted them down thoroughly and scattered seeds on the top, covering them with a bit more soil.  I only planted about a third of the seeds just in case it's pushing the season too much.  Onions and leeks are hardy seedlings, though, so they should be just fine.  They're in a plastic tray and covered with a clear plastic dome to give them a little protection.
The First Seeding of 2013
I'm growing Bandit Leeks and Copra Onions which are mainstays in my garden.  This year I'm also trying Apache Scallions.

A word about my potting shed.  My husband made it for me using a lot of found materials.  The studs came from our own trees and the glass panels on 2 walls and on the south-facing side of the roof all came from old sliding glass doors.  I have slatted counters under each wall panel which provide lots of room for starting seedlings.  Starting seedlings and storing my gardening equipment is all it's used for.  Oh, and it provides a shelf outside for mason bee homes.  In the picture below, you can see them under the peak of the roof.  And no, your eyes aren't deceiving you - the roof is much longer on the south-facing side than the north one.  There's a vigorous rosemary bush growing at the base and on the south side is the beginning of the lined dry-stone creek which takes runoff from the shed roof to the pond.
My Handy, Indespensibile Potting Shed

At this time of the year, there's not much growing in the garden.  Most plants have been pulled out and put on the compost pile.  However, I still have Bandit Leeks which keep right through the winter.  And several plants of Fordhook Swiss Chard still provide a meal every now and then.
Bandit Leeks - the last of the 2012 planting